top of page
CGI Foundations
Introduction to Unity
(Cross- Platform game engine)
In our first week a new Engine was introduced - Unity. Engine for creating games and experiences both in 2D and 3D. I has it's own Unity Web Browser . It has own Asset Store. Many Assets can be bought/sold or free downloaded.
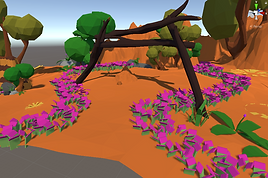
Through downloading an Asset (LoPolyEnvironment Asset), we had our first task, to look around in the interface of the Engine and to use the Prefabs (Every model the takes part in the actual Asset) and to build our own Environment.
Prefabs:

The controls for looking around, moving the object, rotating and changing the shape of the Engine are similar to the Software Maya. It was not hard to orient myself. I started dragging figures on the workspace and I arranged them as I wanted.
Look a the process of creating and LoPoly Environment:


Final Screenshots:




Autodesk Maya - scene organisation, Display Sculpting and Displacement
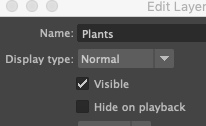
1. Scene organisation - The scene with the same Assets from the previous lesson is being loaded in Autodesk Maya. For the good working in a team with other people we need to organise the whole Scene on parts. We learned that we can group/hierarchy more then two models, to combine them, create Layers in Maya and to Name them.
The Assets and the window with the Layer Editor for grouping and creating Layers (and naming them):


Also to use Special duplicate and Instances with part of the Assets.
2.Poly Count and Poly Display - From LowPolly Rough figures they become smooth and it is easy for creating and environment.


3.Soft Selection modelling - With Soft Selection it is easier to sculpt the shape of a PolyPlate and other Poly Figure that is capable for modelling.

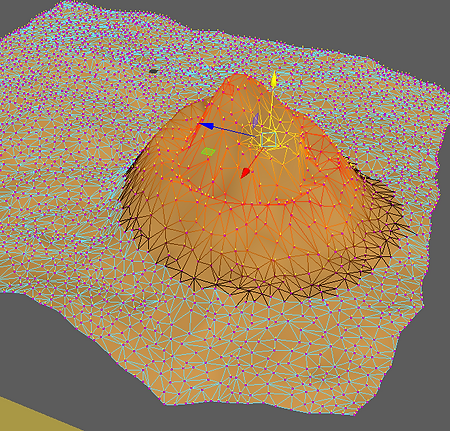


4. Sculpting Tools in Maya - Brushes which helps us shaping the form.

This is how it looks like when you are using a brush and you can see two different brushes in Maya. We can Sculpt with Maya, Mudbox and ZBrush.

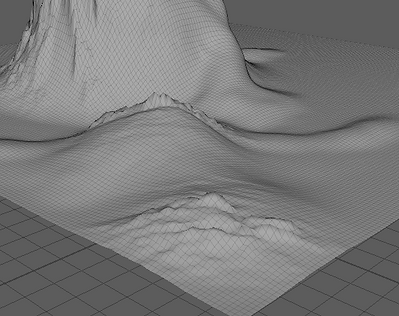
5. Displacement - I downloaded a picture and then exported it in the Sculpting Tools (there is a section for importing an image) and after than started sculpting with this Stamp and you can see the result.


The image used for the stamp; The window for Importing and image;
The Environment that I created with the help of the Stamp and a brush




Maya Modelling and Texturing Pt.1
Environment – Displacement detail

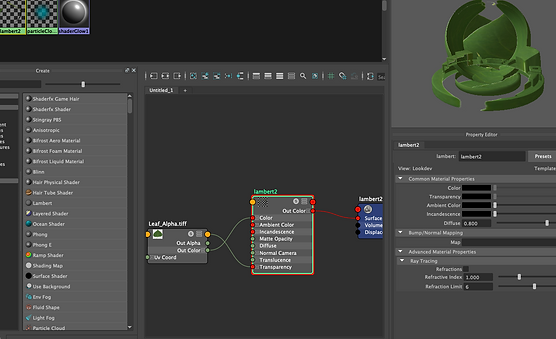
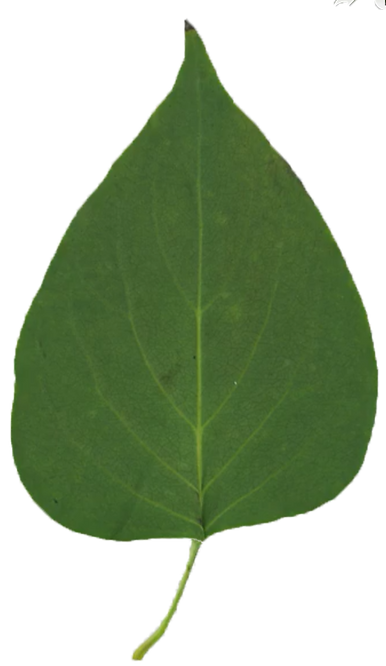
We learned how to create transparency in 3D with Alpha Chanel with photoshop. After creating it we import the file in Maya as a texture on a Poly Plate. And With the help of vertexes we can shape the leaf to look more realistic and organic.
Plant
I have done a little plant using this technique for creating an organic leaf and used a Smooth mode for the structure of the stick to look more realistic. Duplicate and Rotate for the leafs.


Displacement Texture
We learned how to crop part of a set and to hide the other part. It is on the same principle that I used above, after separating.


Lighting - Maya and Unity
1. Import and Light Editor/ Exposure and Spread
Let's look a how it works. I used already modelled model of the Bust of Nefertiti. And started playing around with the lights.
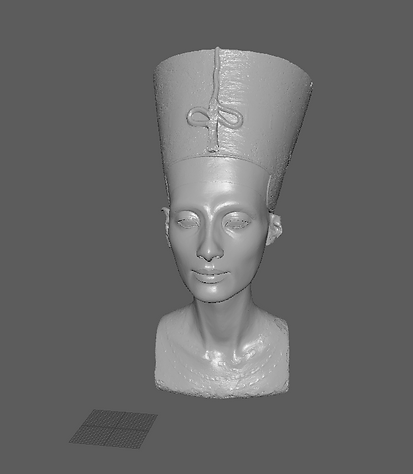

It is easy for importing, this is an .stl file, after importing it you can play with the Exposure of the light and the Spread. There are different tips of lights in Maya. And our task was to learn how to position them. After adjusting those two settings that I am showing you in Arnold can be seen the result.
Once you open the Light Editor and set the light you want /
you can move the model in Arnold only through this window that you see next to Arnold.


This is how it actually looks when you play with the Exposure and the Spread. Here are three different light adjusts.


2. Light Blocker in Maya
Light Blocker is easy to set and it is used as the invisible cube that blocks a light and creates a shadows that smooths the sharpening light. Here are examples of how it looks in Arnold, the settings and on the Workspace.


3. Render Settings
Moving the quality to HD 1080p is a good idea for a good quality renders in Arnold.


4. Gate Mask


Realtime Lighting - VP2.0 AA/AO


Maya organic modelling, UV unwrapping and ZBrush detailing
1. Organic modelling - tree
I used based model of a Tree that helped me to create my model of a tree. With Maya we can create the based model, but putting details it will be more complexed, that is the reason why we imported the model in ZBrush. I will show you the process.


To create the shape of the three, I looked at the example, I created a cube and a Curve above the cube. Selected them both and extruded it. Subdivisions are adjusted and with the help of selecting Faces and Extruding the organic three is nearly done. Button 3 changed the form to smooth mode.


Above are the settings and how the tree looks like while extruding. Under is the finished version of the tree in Maya.
2. UV Unwrapping
The UV Unwrapping helps to create the right UV Map for the organic three and after that every texture to fit perfect. Using the ToolKit adjusts the UV Map. See the difference.
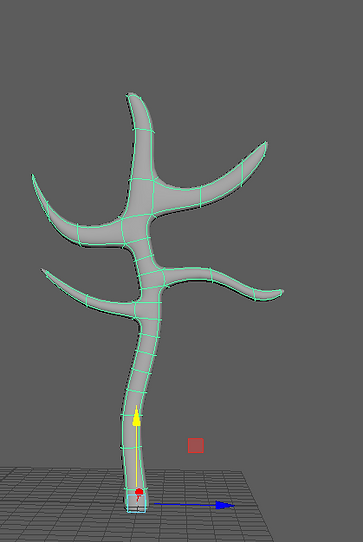


Before Exporting and Importing the file in ZBrush, it is needed the file to be saved as .obj
3. ZBrush - Brush and adding details


After the file is imported in ZBrush and the actual Brush that we need to ad a tree details, we ended up with 7 million and above polygons in ZBrush. You can see how it looks like the tree after using the tree brush. You can rotate the brush and to adjust in many ways.
Screenshot from Blackboard "Week 5" slides:


Assignment 1 –Focal areas
Our first Assignment is to focus on one or more areas that we used to learn from the start of Semester two.
We learned how to work with Unity and to place Assets, do lighting and how to import assets created by us in Maya.
We covered and different areas in Maya such as: Display Sculpting, Displacement, Scene Organisation, Soft Selection Modelling etc. Also, we learned new ways of texturing with Alpha Channels and in Hypershade. It is covered UV Unwrapping, organic modelling and detailing in ZBrush. How to do the lighting in Maya helps us to create the mood of a scene and helps the models to look more believable.
My idea to show this new skills is to create Mini Forest Environment in Maya which includes trees, grass, rocks, blizzard, shrubs and plants. When I model them then I can start with the plate where my Assets will be placed. I will shape the ground and will texture every part of the Mini Environment. I will build all the lighting and will show you everything step by step.
1. Mood Board with ideas and references that will help me with creating this are.


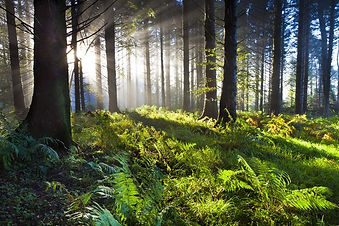


I decided it will be easier if I start creating every asset separated and after creating my list of assets, I will start placing them on the plate where my environment will be. It this way my time for work will be shorter and I can explain for every asset how it is done, how the texturing is done and also my work with ZBrush for detailing.
Materials setup (Maya|Unity (Normal|Displacement))
- WEEK 6 -
We started with Megascans Assets. After downloading we imported the pipeline in Maya and started working in Hypershade and After that in Viewport. These Assets have Map for Colour, Displacement and Normal.
This is the actual look of the Megascan Asset and it is gray without textures yet. The is a whole folder for it and you have to put the texturing with the help of Hypershade.
Import FBX – LOD (Level of Detail) - These files are included it Megascans archives with all the meshes at different levels of details.


All the three files which are the textures have to be placed in their area in Hypershade if we want to assemble the whole model. You can see screenshots from the work space in Hypershade. I used the tutorial from Blackboard to do this and it helps me to understand why everything is happening in this way.


After finishing with placing the Maps you can see how the Asset looks like and how shiny it is. This can be fixed with Adjustments. This shiny look can be easily removed and this Asset can look more believable.


We can adjust those windows which are opened bellow and you can see the difference and actually how believable it is actually.


Unity - Importing Asset with textures
First from Maya we export the file as .fbx file type and we import it in Unity. I learned it from a tutorial in Blackboard. When we have it next to Materials and Scenes we can drag it in the work space.


When we drag it, itt is very small, but with the help of our placing tools you can see the model from Maya without textures. So, bellow, we have to import the two types of textures into the folder Materials and just to drag them into the Asset.


After dragging all the two types of textures and adjust the cut off the part that we do not need you can see the difference below. In Unity we have a good new Asset.


Mini Forest Environment - Tree Modelling
This is my first ever tree modelling in Maya and detailing and working with ZBrush.
I looked at few tutorials about how to create a tree in Maya.
One of them was to create PolyCylinder and to start modeling through selecting faces and extruding them. After that to extract a few faces and to cut it from the model if you want to create fast tree branch. After that to select the edges and to combine the two models and to bridge the edges. But I prefer to do it more slowly and to shape it the way I want.
The subdivisions went to 5 in each way and I started extruding faces and scaling, and rotating .


It took me 5 min to model it and to adjust it the way I want. and I wanted to practice on UV Unwrapping and I created UV Map for the tree. I used tutorial from Blackboard - Learning materials.


When my model was done I exported selection and created an .obj file (for object) with my tree and imported it in ZBrush as a tool. For the tree details I putted Alpha Channel of a tree surface (it is a .pds file). And started drawing on the model until the polygons turns about 50 000 polygons.


I do not want to create a Normal Map for texture and to put it in Maya trough Hypershade. I did another thing. After adjusting the Division into 7 in ZBrush, I detailed the model and redused the polygons 3 times and they become from 50 000 to 3 000 and all the details were still there. The model was straight imported from ZBrush to Maya (there is an option in ZBrush). And you can see this detailed model of a tree in Maya.
Substance Painter
Model importing and Material Layers
In week 8, a new Software was introduced to us - Substance Painter. I will show how I have played with the Software with already existing model. I just worked on the texturing of this skull. You can see the interface of Substance Painter and there are a lot of things similar to Adobe Photoshop. Here, texturing works with layer as it is in Adobe Photoshop and you can hide and create texturing. It is possible to paint with brush, searching for materials, create yours and etc.

I started with Material Layers. I learned that we can change the Output Size, to change and drag materials into the model, here are some screenshots of the materials, an adjust window and how the teeth of the skull looks like when I tried the brush for a first time. The Software is very friendly with easy understandable interface.


Bake Mesh Maps for Curvature
So, the thing that it is done is very similar to ZBrush, we are creating a Displacement Map for the model and you can see a window down with the texture set settings with all the Mesh Maps created for the model. I showed you the material that I dragged to the Model (Iron Row) and after that just started with exploring what I can do with adjusting it. We can create different layers with materials and to adjust the whole model. Even to select areas where the new material can be put.


SHELF material presets
Through the window "Properties- FULL" I can adjust the whole material and her you can see three varieties of the texturing. We can scale, rotate, rough the model, change colour and even put stamps on it.


Mask & Metal Edge Generator
I added White Mask to the Layer and Generated it with Iron Material, after that changed the colour of the mask and the colour of the material. Here are screenshots of the process and the look of the model.


I have played around with Alphas which are very similar to ZBrush Alphas, where you can do an Alpha stamp and to modify it as a brush, it is the same her, you can change the material of the Alpha, the colour, shape, size and etc.


And at the end I have put an environment where I can play with the light provided from the 360 degrees environment and to adjust things again. Now the skull looks very good.


Rendered in Substance Painter:


Importing textures in Unity from Substance Painter
In today's session, we worked with the model from the previous lesson - skull object. After opening Substance painter, we learned how to export the textures from the Software, because we cannot export the wole model with the textures together.
After opening the Substance scene fila with the already done model, I exported the textures and made them be capable with Unity (Standard Metalic Texture) - preset. And exported them in folden and opened Unity Engine.
.png)
.png)
Add mesh to the scene - Create Material and using Inspector
I exported the mesh from Substance Painter and after opening Unity I imported the whole set of maps created by SubPainter. And also, Imported the .obj file and dragged it on the workspace. After that started creating Materils in Assets and dragged all the maps to it's space in the window.
.png)
.png)
.png)
.png)
Add E|nvironment Map
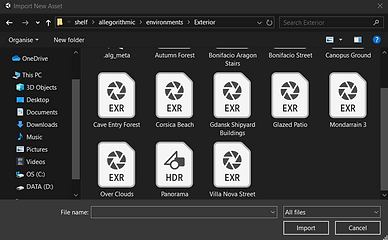
I imported a new set with new Materia and named it Environment. I imported file from the Substance Painter's files " Villa Nova Street" and in Inspector adjusted the Texture Shape and Mapping and applied. Then I adjusted the lighting in Rendering with Skybox Material.
.png)
.png)
.png)
Assessment 1: CGI Dimensions of Practice
My Word Document about my first Assessment with all detailed descriptions about my project - Part of Environment Forest.
.png)
.png)
.png)
.png)
.png)
.png)
.png)
.png)
.png)
Substance > Maya
1. Maya Arnold Export Settings
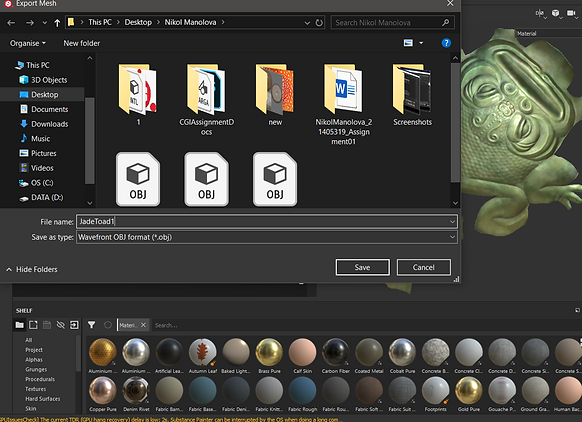
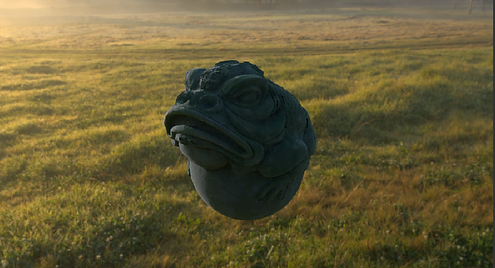
I opened the Substance Painter example file - Jade Toad from the Software and on the tab for CONFIGURATION I selected the preset - Arnold 5 (AiStandard). After the selection I exported the textures with document size 2048x2048. Also, exported the Mesh from Substance Painter to be capable for Maya.
.png)
.png)
.png)
After all that, I imported the .obj file in Maya and loaded the boject. This lesson is for importing textures and using Hypershade to to it so. It is not easy for me to learn everything about Hypershade, but this is the 3rd time doing it and I can understan it better.
.png)
.png)
.png)
.png)
I created an AiStandart Surface material and opened Hypershade. Then, I started replacing for of the maps as it is shown in the lesson and created blueprinting in Hypershade for the figure. I setup the Hypershade.After redoing all the work to understand it in dept I researched about Colour Space in Maya and from the learning materials from Blackboard. Then Dragged the whole Material in the Viewport on the figure and done.
.png)
.png)
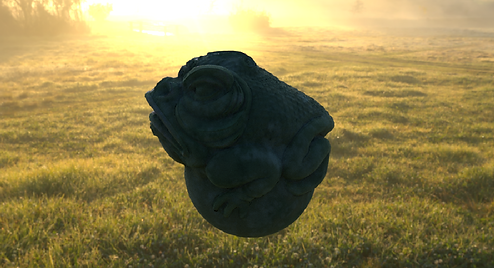
For ending I could not find an example Environment from Substance's folder and downloaded one from the HDRI link from the Module in our previous semester - DIgital Toolbox - Week 3. The final result.
.png)
.png)
.png)
Maya - NURBS
We talked about NURBS (non-uniform rational b-splines). This technique is used for creating a
models with smooth surfaces. In the industry is very popular for animation.
They are very smooth surfaces which were used before subdivision surfaces and a Renderer can show them while rendering like very smooth surfaces.
The difference between Polygons and NURBS is that Polygon models are made from milions of triangles and NURBS are made from curves. Most of the 3D Artists use Polygon modeling but NURBS is one of the most famous techniques even used by Pixar's projects.
I researched and have red this Document for Pixar's "Art and Technology at Pixar, from Toy Story to today". https://graphics.pixar.com/library/SigAsia2015/paper.pdf
My curiosity made me want to try do a basic NURBS modelling and it is not that hard, but it is a bit complex if someone want to create a model of a car. I created 2 curves and with the help of Surfaces -> Loft and it is done. You can see it.
.png)
.png)
.png)
.png)
.png)
Assignment 2
A Crown
For my second assignment it is needed to consentrate on texturing and shading using the software Substance Painter and to show experiance with it. I did not wanted to use an example model from Substance Painter and designed my own. My model is like jewelry but more incredible and complex. I wanted to design a crown.
First I did not know how to start, so I researched for modeling a crown and the most useful tutorial was about creating a Celtic Ring:
And looking through the tutorial it became my reference for the start of my crown. I really liked the example and wanted to transform it in my way in a beautiful crown. My model is done by Polygon Figures and the first one was Polygon Torys. The beggining was that I subdivided it to 20 to look like a circle and did an adjust to the ridius inside the circle. Then I went to vertex mode and and scaled the vertex points that I wanted, you can see on the screenshots.
.png)
.png)
.png)
And looking through the tutorial it became my reference for the start of my crown. I really liked the example and wanted to transform it in my way in a beautiful crown. My model is done by Polygon Figures and the first one was Polygon Torys. The beggining was that I subdivided it to 20 to look like a circle and did an adjust to the ridius inside the circle. Then I went to vertex mode and and scaled the vertex points that I wanted, you can see on the screenshots.
I duplicated the figure 3 times and the first element was done. I rotated and adjusted the tree elements together.
.png)
.png)
.png)
For connecting the mesh I went to Mesh -> Booleans -> Union and all the three elements became connected like one, very smooth and good looking.
.png)
I learned a new skill, very easy and effective through Animation. I rotadet the model upwards to 90 degrees and with ctrl + D to duplicate to other model and with shift + D I duplicated the model several times next to each other to be in a straight line. Then Mesh -> combine and became one.
Then I went from Poly modelling to Animation and used it. Create -> Deform -> Nonleniar -> Bend and then rotated the bend handle in the right way and I bended it to became all in one circle. It was easy and it took me 10 minutes.
.png)
.png)
.png)
.png)
It looks really good and detailed. Another part was this circle basis created by other Polygon Torys, again, adjusted it to be scaled the same way as the details and started detailing.
.png)
.png)
My curiosity made me want to see the crown with the details textured in Substance Painter and I exported it as obj. file and imported it in the Softwere. For now I used only one golden material for the model and adjusted the Base Colour, Roughness and render it in Substance Rendered. For now it looks good, but I am planning to add diamonds and crystals on it + adding more details using Maya.
.png)
.png)
.png)
.png)
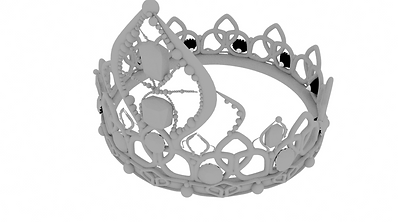
The last version of the crown model. It is broken on 3 Parts. The first noe is the main frame of the crown. The details around the the above part of the frame are the second. The third part are the diamonds and the crystals. It is very helpful for creating the textures in Substance Painter to broke on peaces the model. There is an option in the software where you can hide that parts of the model that you are not going to texture with the same material. So, I created fot those three parts material for each and then exported the object.
.png)
.png)
.png)
.png)
It took me 15 minutes to model a crystal and a diamond, through multi-cut and harden mesh mode, they are easy done.
.png)
.png)
.png)
.png)
.png)
Working with Substance Painter
I started with the interface of the software. I learned a lot about it. It has its own renderer called Iray. Is Substance it is possible to have a background and you can adjust the lighting only with 2 buttons, to adjust the blur of the background, every background has its own lighting and contrast. As I said, already, in Substance it will be easier to broke a model in pieces and to start with texturing and shading. The software is very friendly, with not a complex interface. It has materials window, display settings windows, shader settings, properties for the brushes and etc. Also, a mesh can be backed there, it is really effective because all the models imported in Substance look very good, the Renderer shows a lot of details ( it is realtime rendering) and at the end the model looks amazing even if it not that complexed for texturing. For exporting textures, it is possible to export only texture maps from Substance Painter and to send them into Maya, 3Ds max, Unity, Unreal Engine and etc.
I started exploring it and started texturing my crown piece by piece. After exporting the mesh, I baked it.
The srat was with the base componenet - the frame of the crown. I dragged and droped only a Material because there is a difference between the Smart Materials and only Materials. I researched and watched this tutorial:
The Viewport in Substance Painter shows the model and the texturing in a different way, as I said above, we have background that we can change, we can change its light and etc. It is different. The Renderer is also different, it shows a good quality, lighting, the textures look very beliavable and good.
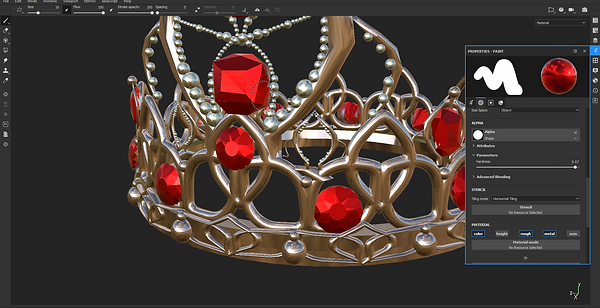
So, I dragged a gold material and drop it on the model and it bacame a layer. Layers are important in Substance Painter and also, very easy for using. When I dropped the material it created itself a layer. I can hide the layer, delete it and etc. When you add another layer it automatically make it available to paint with a brush on the model. So, my model has three parts and that is why I have a layer for each part.
Very cool thing in the software are the properties of the material and texture set settings. You can work with the material and the texture and to transform it. To create a surface on it and to create roughness and to change colour. To change the base colour ( texture map) and the metalic ( texture map ).
.png)
.png)
.png)
.png)
I adjusted some of the texture set settings, like I added Opacity and worked with the colour of the material, roughness and added that metalic look.
Material Used:
.png)
.png)
You can see how good it looks like now, but in Autodesk Maya will look completely different becauase of the Renderer, the lighting, a background and etc. You can see the above model with the same material before adjusting and now down after adjusting. It looks more realistic and with roughness and metalic look lika a real pure gold. My work is to make this model look lika a real object.
.png)
.png)
After finishing with part one, I started with the second one. I created a new layer and started painting with brush only those small details made from poly spheres and again, it is possible to adjust the material and to choose between what kind of roughness you want to apply on the material that you are painting with. Also, can adjust what kind of material you want, in Substance Painters palette with materials a lot of good materials are available. Also, materials can be downloaded from Substance Painter - SP's free exchange platform. People share materials for SP which is great and easy for import into SP.
You can see the roughness and the metalic look that I have created. There are a lot of stamps in the software but for my Crown I do not need so that is why I do not talk about them.
.png)
.png)
.png)
For the third part, I have done exactly the same thing, I used a brush and a material, I created that more not metalic look for the crystals and diamonds. I wanted all of them to be in one colour - red. Aesthetically it looks better. If I wanted all of them to be in different colour or maybe two of them to be in the same colour I need to do it in Maya first before exporting it as an object. I will be this way - you have to select them and combine them to be shown in SP as one part and then to assign a standard surface material in maya because they will be as one object or for every diamond and crystal to be done the same and all of them can be textured separately.
.png)
.png)
The crown is done and now can be rendered in Iray. The good thing in Iray is that the lighting and the background, contrast and brightness can be adjusted. Really friendly renderer and it has really good quality.
.png)
Render images from Substance Painter:


The last part is to export all the textures for Arnold (Maya's renderer) and to assign them to the model. I exported the texture maps (5 texture maps for Arnold). For my 3 different materials I have 15 texture maps done for Arnold. Very easy for exporting and importing. Click on File -> Export Textures and this window will apear. After setting the location of the images that are going to be created go to Autput Tepmates and there you have to choose Arnold 5 and all the settings will be done for Arnold. You can choose to export textures and for other softwares.
.png)
.png)
.png)
I opened the Maya project and set up the materials through Hpyershade. It is easier for me to do it in there, I just click on the material and add for every part it's map and done. You can see how it looks in Arnold.
.png)
.png)
I added a Skydom light with colour -> 360 degrees image from HDMRI and edited some of the settings of the renderer. You can see because of the light how the textures look so beliavable and beautiful. This was my aim. Textures done with Substance Painter gives incredible look to the model. Very strong and beliavable.
.png)
.png)
Final render images form Arnold:


Iray: Arnold:


Assignment 3 - Personal Development
Interior Design
To begin with, I felt very good about the way I learn about creating 3D imaginary world that exist only digitally. I tried to reach my point and to give myself answer about what exactly to start developing for my third assignment. My desicion is to recreate a living room from picture, to show my skills about modeling realistic areas with small details and, furnityre, lighting, to work with my perspective skills, to find the right angles for rendering, creating a 3D atmosphere, working with texturing from easy to medium and to try working with XGen.
It is very important for me to create something that makes me feel good with is, so I started researching for ideas and saw a video tutorial in maya - How to create a carpet in XGen and an idea came to my mind - I decided to recreate a living room and called my project - Interior Design.
As an artist, I worked a lot on my perspective and drawing skills - recreating real places, drawing buildings, landscapes, drawing objects from different positions and working with light.
Also, as my hobby is photography, I worked alone for 4 years researching and for lighting, perspective, points of view. That is why I already knew how every detail work, and that is the reason I wanted to show my skills and how far I have gone with the Software - Maya.
About software, my decision is to work only in Maya, to try experiancing with materials, textures, working on the render view and working with glass, XGen and lighting. I will show you, step by step, how a living room model will be done.
1. References and researching for materials.
All I wanted to find is only one image of a living room, something like Interior Design and to build my my model from the actual image. So, I found a web page with pictures of 51 luxury living rooms, page full of examples and inspirations. The page is: http://www.home-designing.com/luxury-living-room-interior-design-tips-ideas-inspiration
This is the page from where I found my reference image. This is the perfect reference, because it has so many details and it will be satisfying for me.

Dvice Inc, 2020. Http://Cdn.Home-Designing.Com/Wp-Content/Uploads/2018/11/Luxury-Living-Room-Interiors. [image] Available at: <http://www.home-designing.com/luxury-living-room-interior-design-tips-ideas-inspiration> [Accessed 28 May 2020].
Researching for textures after finding the right image was the second step. I already have registration in Textures.com: https://www.textures.com/
Before start downloading texture maps from Textures.com I researched for materials and saw article about 50 wall interior design, I just wanted to inform myself what will be good for this style of interior, what kind of textures to start looking for and etc.
Article: https://nextluxury.com/home-design/textured-wall-ideas/
2. Modelling and Texturing - Part 1
After feeling confident, I created a project and started working in Maya.
.png)
.png)
.png)
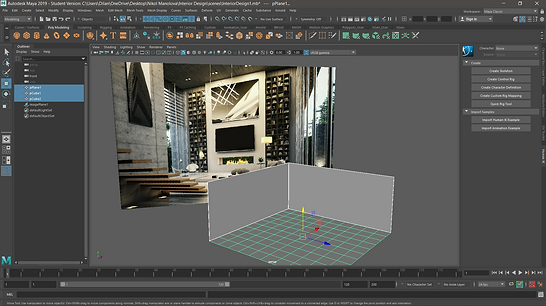
I started with the base construction of the room and decided to build peace by peace, models and the to texture them, not modelling and the texturing. In this way I will be able to see my progress and does the textures match with each other. Everything will be with iStandardSurface material and I will be putting only Colour maps on my models and with UV Mapping I will edit the textures. For the other maps like metalic, roughness and other adjusting parts for the materials I will work with the Attributes of the Materials direct in Maya.
I started with the walls, you can see, with the help of skydom light I render it for a first time.
I will show you the colour textures that I used as a floor textures and wall textures icluding stairs and models which need wood textures:


You can see how I assign new materials and use iStandardSurface materials everywhere and use files for the colour of the textures. Sometimes is nesessary to only adjust a basic colour on a material and the other part of the work will be done with the help of lighting and editing the material atributes.
Sometimes, for specific materials I can open Hypershade and will adjust some things for the material from there, but I prefer to do it in Hypershade when I have created textures and materials in other softwares as Substance Painter and after that to export all the maps and to use Hypershade to adjust them for the renderer.
.png)
.png)
.png)
.png)
.png)
.png)
Everything that has been modeled for now is done from PolyCubes only, scaled, positioned and rotated. I am folowing the design by the picture. I have done the stairs and render the scene in Arnold to see what I have done.
.png)
.png)
.png)
The bookcase is modelled for 5 minutes, I dragged a polycube and used multi-cut for creating edges, then extruded the faces. The material is iStandardSurface and adjusted the colour.
.png)
.png)
.png)
.png)
.png)
.png)
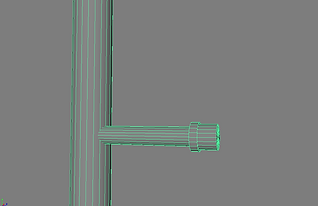
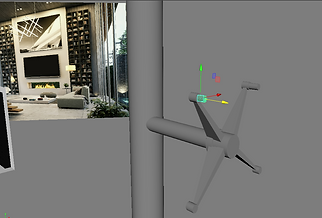
The pylon was very easy to be modeled. You can see that the modeling is very easy, the thing is the texturing. I used only Maya to create the texture and this metalic look. It looks really realistic. I tried the editing options in the atributes window for the material.
.png)
.png)
.png)
.png)
.png)
.png)
In the example of a living room, there are windows. I was very curious about how to create the material and the glass look, so I saw a tutorial. It is very easy, I assigned new material - iStandardSurface and then I used the tutorial and it showed me how through the material atributes I can do a glass surface for seconds. You can see how it looks, I will show how it looks in Arnold.
.png)
.png)
.png)
.png)
I used HDRI image and created a light, just to see the difference and how it looks.
After being done with that I modelled a TV and started putting details like this part at the bottom and there is going to be a fireplace, but for there I will use only texture.
.png)
.png)
.png)
Also, I put a Painting above the TV. You can see how I adjusted through thr UV map the textures of the fireplace.
Textures from:
Fireplace: https://health.clevelandclinic.org/fire-pits-bonfires-and-your-lungs-7-safety-tips/
Painting: https://images.metroscenes.com/2012/los-angeles-california-december-2012/2062/black_and_white_los_angeles_traffic/
.png)
.png)
.png)
.png)
Arnold render of the scene without builded lighting:
.png)
3. Details - Books
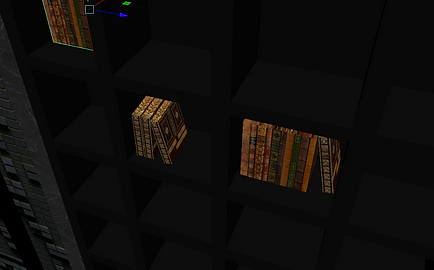
The books are only polycubes. I applied an image for a colour map and adjusted it in the UV Editor.
After that I scaled them and added modelled vase models, because I want the whole room to look like real. More details, the better.
I used textures from:
http://bgfons.com/download/3014
https://www.turbosquid.com/FullPreview/Index.cfm/ID/523555
https://mmls.mmu.edu.my/wordpress/1142701049/
https://www.dreamstime.com/photos-images/book-spine-patterns.html
.png)
.png)
.png)
.png)
.png)
.png)
.png)
.png)
Final look of the bookcase with all the details:
.png)
4. Plant modelling
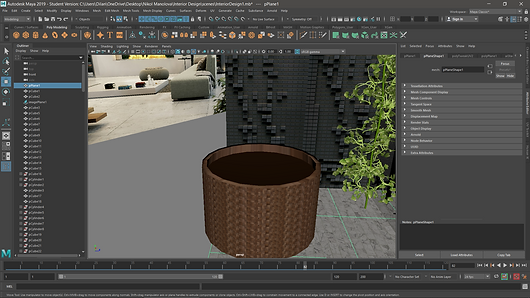
For creating my bush I used a technique that I learned from a tutorial. I learned about the paint effect in Maya, how can be used, I learned how to use the content browser and actually I created a brush in Maya and from the content browser I used one of the presets. When I painted my plants where I wanted, I was amazed. They are actually created the same way as the alpha channels work on a plate as a texture. When I opened Hypershade I could adjust the material, the quality of the colour and etc.
Also, I learned that the alpha channel textures can be visible in Arnold. I converted the Paint Effect to Polygons from Modify. And when I touched the material in Hypershade, the plant was visible and realistic.
The YouTube tutorial is:
.png)
.png)
.png)
.png)
.png)
.png)

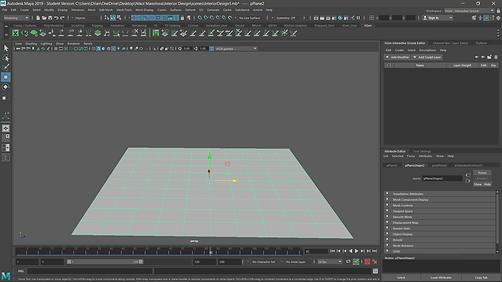
5. XGen shaggy rug using fur
Creating this carpet was actually very easy. I looked at another tutorial. I started with a plate created from polygons and then switched the mode of Maya Classic to XGen - Interactive Groom. After selecting the plate I went to Generate ->Create interactive groom spline. And I get these brown thing are going to be the fur of the carpet.
We have description, sculpt and scale, description base. I played with the scaling and increased the density of the description base, it needs to be careful with this becasue the fur may get a little bit too much. You can see the steps in screenshots. I went back to the description and adjusted the width scale because I wanted every piece of the fur to be thinner and played with those settings. I added modifier - a Noise, that will help the fur to look more realistic and messy. Again it can be adjusted to the Attribute Editor as I used. A grass can be created this way too. In general I used it to create a messy fur.
Colouring - I assigned a material on the plate. After that I wen to Hypershade and clicked on hairphysical. This is what is assignet to our object - the plate. When we change the tip colour, we actually change the fur. I desided to create a grey carpet but before that I tried with pink.
Maya tutorial:
.png)
.png)
.png)
.png)
.png)
.png)
.png)
.png)
.png)
.png)
6. Sofa
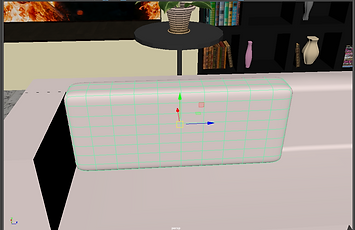
The Sofa was very easy for modelling. This modern sofa is with soften edges, the main thing is the material editing. It is without roughness as you can see and it has metallic parts in the bottom of the sofa. See the process:
.png)
.png)
.png)
.png)
.png)
.png)
.png)
.png)
.png)
.png)
.png)
7. Other parts of the living room:
.png)
.png)
8. A chair
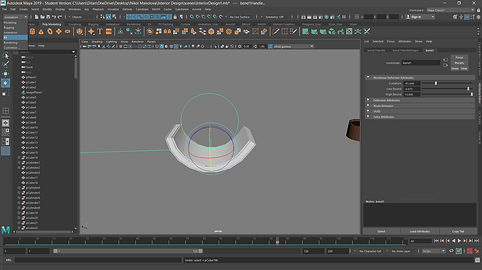
It is modelled with the help of a bend and animation. After modelling the chair - I used scaling, multicut and soft edging, I used a bend to create this round form of the modern cfhari. At the end I deleted the history by type and adjusted the material - iStandardSurface.
.png)
.png)
.png)
.png)
9. Creating lights and lamps. The lights are very easy to be build and the models of the lamps are easy to be modelled. After creating the frame of the lamp I used a sphere inside the lamps and made it an actual light. I went to Arnold -> lights . In the Attribute editor I adjusted the diffusion. and you can see how realistic the lights inside the frame look like.
.png)
.png)
.png)
.png)
.png)
.png)
I created two cubes and on them, I placed area lights. They built the light very good an
.png)
.png)
.png)


FINAL RENDERS:
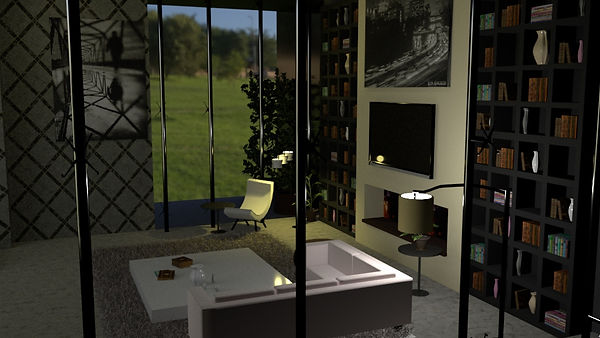

The Interior Deisgn is done. I am very happy with my progress. I worked with XGen, new techniques and improved my working with materials, colour maps, rendering and lighting. i experimented with all of these things and I am done. The living room look so luxury, realistic and fancy. Environment design is one of the things that I enjoy.
bottom of page