DIGITAL TOOLBOX
- WEEK 1 -
Through our first week in Module 1, two tasks were given to us. To create two images with one of the softwares provided to us for creating - Photoshop. We learned how layers in Photoshop are working and how to create from two images, another one. We recreated " Stonehenge " with a different sky and created " Hybrid " from two different animals. Here it is:


.jpg)


- WEEK 2 -
Through our second week in Module 1, two tasks were given to us, again. To create two images with Photoshop. The first task is that Lady, we used to learn how to use masks in Photoshop and how to recreate that green background (green screen).We learned again how layers in Photoshop are working and how the are helping us to see the developing of our project. The second task that was given to us is the Building. It is made of three different images. We also used to learn how to use brushes in Photoshop. All of the experiments created the Builing. It is very interasting, how we can construct one image with the help of other images and with tools provided from Photoshop. This is my work:

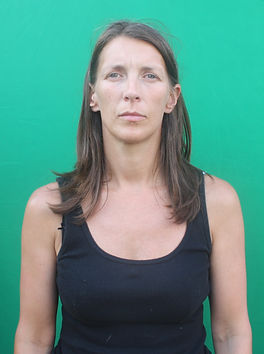
It is very interesting to work with layers, the most funny and the main thing is Photoshop are the layers! And with the help of the masks and the other tools, you can create unreal work.


- week 3 -
INTRODUCTION - MAYA
In our third week of our Module we had an introduction to one important Software - Maya. We learned about the interface basics of Maya. And also how to create an object with the help of that interasting and new Software for me. We learned about the 3D coordinates and how to use basic parts of Maya.
Our first task was to create a Spaceship who will be put somewhere in space of a 360 degrees picture. It is an object in 3 dimensions, so that is the reason it is there. This is the final stage of my Spaceship. As you can cee it is already done, but it was a hard work for me to made it.
Here are some screenshots of my work, as you can see how it looks like in every position as a 3D object. It is very interesting how this Software can create every 3D Model we want and even Animate it.


Here you can see my work in four sides, that can help you to understand how it looks like somewhere in space.
-WEEK 4-
In Week 4 we practiced the using of Maya. Our task was to create a kettle. From the skills that we learned in our third week, we created it. I had difficulties so I made my Kettle two times,but I only finished the second one.
This is my first try of the Kettle:
This is my second Kettle:

Here you can see my finished work of the Kettle, I put it in space, that helps me to improve it and to make it believable.

My Kettle in four sides, It helps me to see what I am doing with the shape and how real the figure looks like


-FAKE NEWS-

BREAKING NEWS
The last two human beings, captured alive from our worst nightmares - Aliens. Their last memory from the day before this tragedy. U.S.A is under the control of the Aliens. Every city is burned and destroyed to the bones.
Today, I used to make my Fake News with the help of Photoshop. It was a great experience with the layers, because I think that is the main thing in Photoshop for creating. Also, I worked with masks, layers, cropping images, putting them all in one and working with brushes. After that I used adjustments of the brighness, contrast, colours ( yelloy, green, cyan, blue, red ). And I created this image. You can see the pictures that I used for my work:
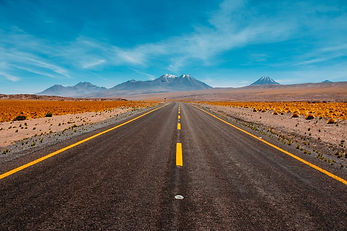


I have done another image with Photoshop, again from three images, I used to create 8 Layers and working with masks and adjustments. I also worked with the eraser, brushes and imagination. I wanted to learn more about how tools work in photoshop and wondered how I can create image that looks like a digital work.
My finished work:



-WEEK 5-
In our fifth week, we learned about The Modelling Techniques in Maya. It is so unbelievable how these techniques help you improve your working with this Software. I understood that it is important to understand them, because you can learn about the interface of this program.
1. Revolve into Polys


2. Loft


3. Boolean


I decided by myself to start this, I want to make something like a towers from a city in another planet, to create part of a city, but for now I use only one figure, as you can see.


-WEEK 6-
In our sixth week, we learned about the Lighting, how to make Arnold Mesh Light in Maya, how to add surface to our polygon figure and etc. Here you can see my first work, this lighted sphere ( ball ):

After that I understood how to put background ( space, where the sphere now is made from glass, because I gave that command when I added it a surface and not it is a glass, you can see the reflection of the background in the ball ). My light now is from the background.


I learned how to add texture and how to make it, so I made it with Photoshop ( I used only one brush and three different colours, but after that I added it to my 3D cube and you can see the result. I played with the light , so you can see on the other screenshot, that the cube look a little bit unreal and not 3D, but I like how it looks like.


FAKE NEWS
About my Fake News Assignment, here I made two more collages. You can see, the First one you can see the tree images that I used for making it. This is Princess Diana, walking with other people. Yes, I put and that airplane in the sky, all made with photoshop. It is believable, isn't it ?

Princess Diana My Background


Here you can see the Layers and how I the process is maden. I used brush for her shadow, added adjustments on the layer of her image and after that adjustments for the plane and the whole image.
.png)
.png)
Marilyn Monroe in front of a woman
Here I made black and white Fake News, it is done like it is on the News Paper. I have made Marilyn Monroe, black and white and I used my three previous pictures from my first Fake News Collage, very interasting.


Breaking news: Marilyn Monroe is still ALIVE? Is she on this highway or NOT? We can only ask the photographer...
.png)
Bond Gadget
For my first assessment I had a task to create a Bond Gadget with the Software which we are using, now, for 3D modelling - Maya (Autodesk Maya). Now I am going to show you the whole process of creating. It was not easy for me, because I have never been working with it before and now I am learning about this complex Software. I decided to model a Hairdryer-Gun. So, if it is in real life it will be cool to have your own Hairdryer that is at the same time a Gun. That is the reason I have made it, I am into this kind of gadgets. Of course, there are so many other ideas about it, but if I am watching a film or playing a game where you have a gadget (if you are playing as a first person), it will be pretty cool to see it and after that I will ask myself, how it is made? So, now I understood how it is created.
1. I ant the shape to be like a hairdryer, so I took pictures of my own, and after that I understood how to put them in Maya, because they will help me with the modelling of the shape, right? After that I started with the modelling .


After that, I started creating the shape, I made a Polygon Cyliner and rotated it, then I stretched it out as far as the actual shape of the hairdryer is. Then I put coordinates in the program about the lines around the figure who helps for fixing the shape.
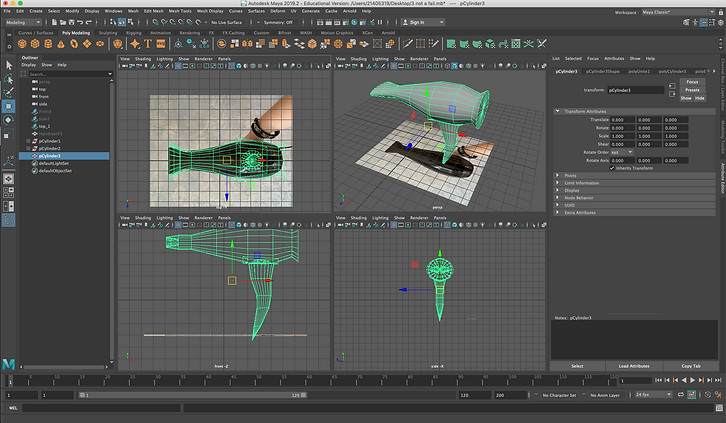
Here are shown all the lines in this figure, you can see the vertical ones in the top part of the figure. I can go in Vertex trough my menu in Maya and then I can select part of the lines and to do what ever I want with the shape. I am working with all the views in Maya, so see how my hairdryer is working. But I deleted that handle and made a new one.

So, how I made it? I selected the parts that I wanted to extrude, because I wanted to made the handle from my Polygon Cube and I have made the handle. I put more lines on my handle to manage the shape an to create a dept in the Bottom of my handle. At the same principle I have made and the part that is common for the Guns, where we are pulling the trigger, to create our Hairdryer gun, we have to make the features of both objects.
2. Creating the texturing. I created an 2D Image of the parts of my 3D object (with help, because that was a little bit hard for me). After creating the image as a jpg, I have put it in Photoshop, to put the textures of my Hairdryer Gun.

These are the forms created by Maya for the textures.Every part of my Model is in this picture, that means I have to put it in photoshop and made It in the opposite - white background with black lines
I used my own pictures, because it is cool to have the texturing from the actual Hairdryer, because I want everyone to see fir a hairdryer, but when people understand that is and Gun, they will be like WOW, right? So I selected the parts of my images, copied them, pasted them in my MAIN layer (the texturing image done form Maya) and they fit very well, but It takes time to make it perfect and to be on the right spot.


That is the last texture, after that I have put it in Maya, to made my model look like actual Hairdryer.


And that it is, my Bound Gadget is done! But I need to put some background, a 360 degrees image.

I took a 360 degrees photo from: https://hdrihaven.com/hdris/ , I select a Studio image, because of the lights, I was thinking "It will look so good with that projectors and the lighting that I will put from the menu "Arnold"". And now, her on the pictures you can see the red lines, they are unnatural light made from Arnold. And I also have lights from the image that I choose for background.


3. The End. here is the end result, I want to say something about the handle and on the other half of the Gadget, you can see the white lines that you will say, mistake done with the photoshop layers. No, I wanted these white lines to be over the layer with the image. For me it look more cool and like a Gadget, because, it is not only a Hairdryer, it is Bound Gadget.


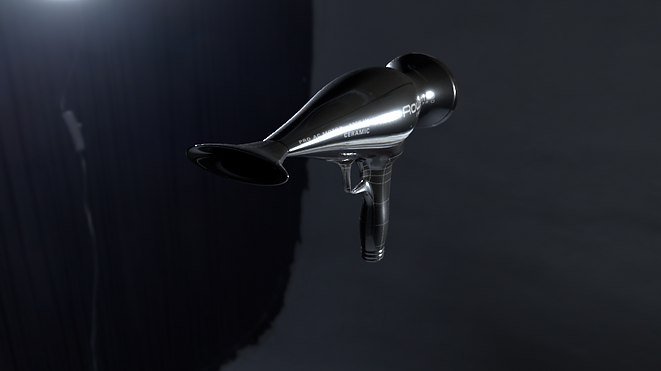

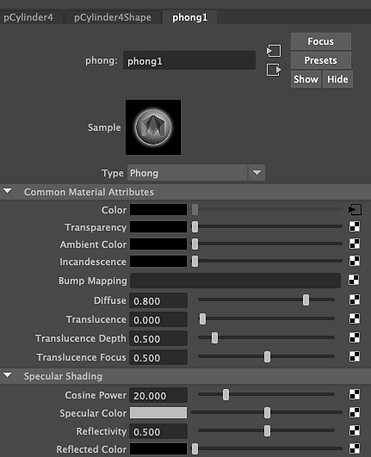
4. Retexturing my Hairdryer. I have put again in photoshop the image made from Maya with the sides of my Hairdryer- Gun, I reworked them and then upload them in Maya, see the END:


1. I am opening the color bar, selecting my Image name and then putting it in Maya.


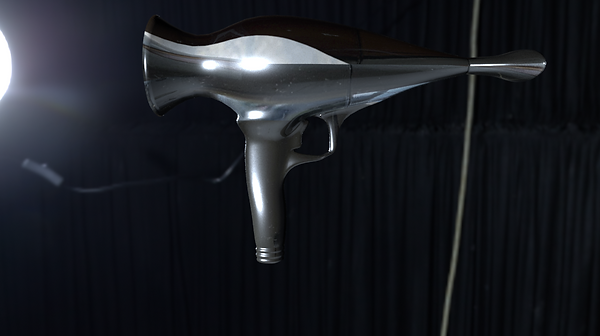
AND DONE, This is the last version of my Bound Gadget:


- WEEK 8 -
Today, I decided to create something like an old TV, working somewhere in a Spaceship, it is more like gadget, part of all the visible features of an area in this Spaceship. It took me an hour to create the model of the figure and to add the texture and the background that I took from https://hdrihaven.com/hdris/ . Look at the process:


- WEEK 9 -
Today, an assignment was given to us- New York Rooftops. This means, we are going to use Maya and Photoshop, because we have to model rooftops and buildings , part of New York or similar to those in this big city.
I experimented with Maya and I will show you some modelling by imagination. I imagined ONLY a rooftop of ONE building, then started to model on parts. It is an experiment as I said, that is the reason I can not show you references about my work.

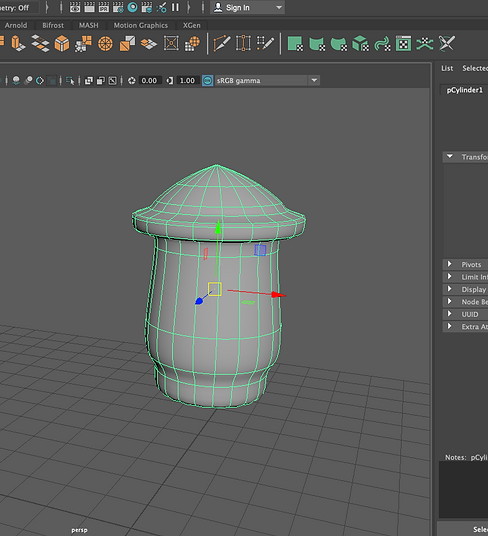
So, I made these two parts of this rooftop, first. After that I combined them and all of it became in one model, so because of the smoothness that I can transform my models with key 3 from keyboard, I used multi cut from my model's menu when I click right button, because I wanted to make my figures more complexed with edges.


After these two models combined in one, I have made a platform, so that will be my ground. I created a billboard right next to my first model and put some details.


I am using this button here, to combine everything in one


At the end, I have made the last part of this module and used again, multi cut and combine. It is very interesting to create architecture in Maya, about creating an environment, Maya is very useful and easy for that, so you can create everything from things in your imagination to recreating an environments.

- WEEK 10-
This week, I used to learn about the texturing in Maya, because of our Assessment for this Module. And I tried something simple, I have made just a cube and after that I wanted to create a textures about this cube, I created a Brick Wall.

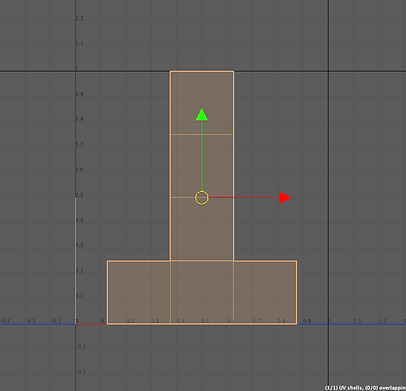
There is an option UV Mapping. We are using it for creating all the edges and faces where our texture is going to be, we are creating UV snapshot as a jpeg file for using and uploading in Photoshop, where we can create our texture.


I took this wall texture from internet and open it with the UV Shot in Photoshop, after that I Copied part of this picture and Pasted it as 6 layers on my UV shot PDS document. Then saved it as JPEG file.

After that I Assigned new Material - StandardSurface2 , and uploaded my JPEG file in Maya, and bam, my wall is done. I have done it for 10 min .

- New York Rooftops -
Mood Board
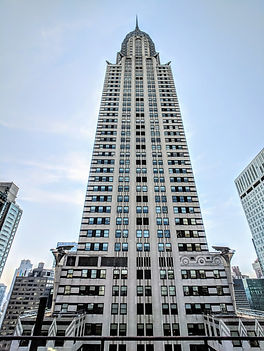
My References for my New Work Assessment - I have to do 8 to 10 buildings in Maya, so I created a Mood Board with all the pictures that inspire me and are useful for my recreations of rooftops and buildings. So, you can see, I will recreate 8 different Buildings and Texture them one by one. When I start I will show you a images from this Mood Board and my work in Maya separate.


_.jpg)


- WATER TOWER -
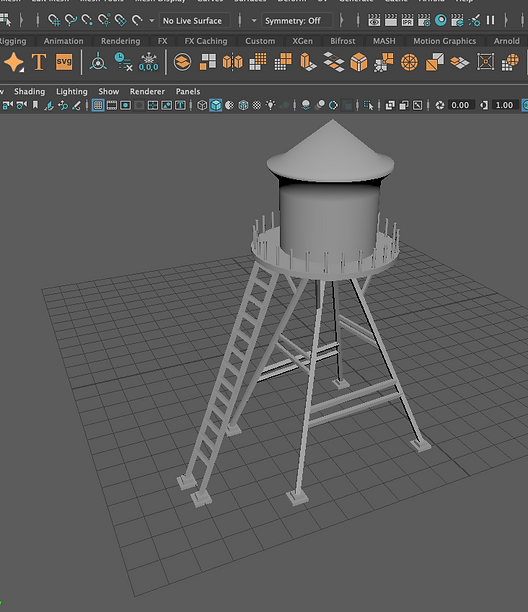
For my Assignment bout New Your Rooftops, I decided to start with the detailed models - Water Towers. My first Water Tower for my project is simple, but it wasn't that easy for me, I found it difficult to build it, because I decided to do the construction in another way. After I watched a video from Learning materials - Week 11 about building a Water Tower, I followed the guidance about Putting a Camera in my project through Rendering -> Putting a Camera -> Panels -> camera1. I imported my reference ( image of real Water Tower ) and started modeling from the image, but them I used some of the constructions of the real one.
You can see my progress:


After that, through polly modeling I have made Poly Cylinder on the grid and then I used Subdivisions for every figure that I have made, I didn't switch the model by button 3 for smoothness, because I did not need it for my figure. Every part of this figure is made by Poly Cubes and Cylinders (only). After making the whole construction I combined them all by Mesh -> Combine -> Apply and Close and Now I have ONE model combined.
About the first part of my Water Tower, for details about the depth under the roof of the WT I used Selecting and Scaling, and Translating, also Rotating ( W key, E key, R key ), I have done the figure in Vertex mode and with the help of Multicut I have done the depth.



- TEXTURING -
About the textures for my Water Tower, I used UV Editor for my UV Mapping and it wasn't that difficult, for the right 2D structure of my 3D object I opened the UV Window and Clicked on Automatic, and it is done, my UV Map is like that :
This is how it look like in Maya: This is how it looks like when I saved it as a UV Snapshot and the actual jpeg file that I have putted in Photoshop:


Here, you can see the three texture materials that I used and downloaded from: and after that I have copied used Photoshop to combine all the textures, I used layers, copy, paste and selecting.
The main texture:


This is the end result of my texturing, it is not the best, but I like it, it looks like from a game released 2003-4, but it is interesting, because I have never done such a detailed UV Mapping and Texturing.
- FIRST BUILDING -
About my first building, I felt very into in when I started modelling it. First I started with creating a cube and with the help of key W, E, R I shaped it as a wall and then, I decided to create window. So, I learned it from my learning materials in Black Board, I used multicut + ctrl to cut it on lines. I shaped my window and after that I selected 4 faces and deleted them, because I wanted to make it look more like a window with glasses, and then I BRIDGED the edges between the frame of the window, to look good.

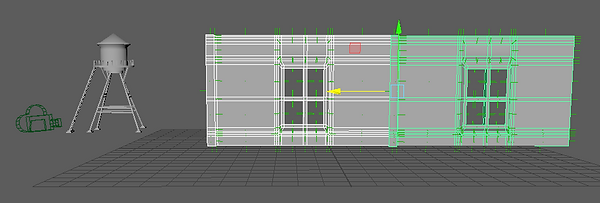
I shaped the whole wall and then duplicated it, but that was a mistake, because my model is complexed and If I do the whole Building without the textures and after that to create UV Map for all the parts of the building, that will be a wasting of time, so I decided to make an UV Map for only this wall and to delete the other wan, to create textures of the whole wall + the window and after putting them to duplicate and to create a whole floor which I have to duplicate several times.
UV MAP: Textures in Photoshop: Result:


And then I started duplicating and then combining every part of the building just to be safe, because I will want to move it and it has to be combined in one. I created another poly cube for a ground, shaped it and UV Mapped it, created a texture and put it in Maya. Now you can see a half floor:
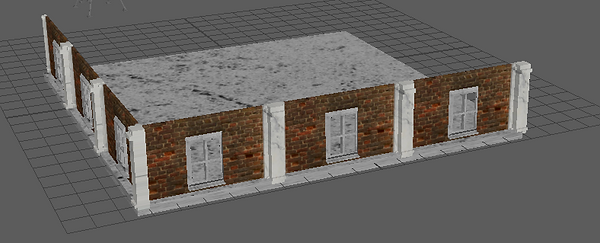

Here is the whole Building with the Water Tower:


- Building 2 -
I have started my second building for my assessment, so I started with a strategy that is simple, but very effective. I tried new things, as creating a wall with window with different shape. It is similar to my firs building, but at the same time I wanted this one to be with different shape, because in every different country we know, most of the Buildings are similar to each other, because of their industrial flair.
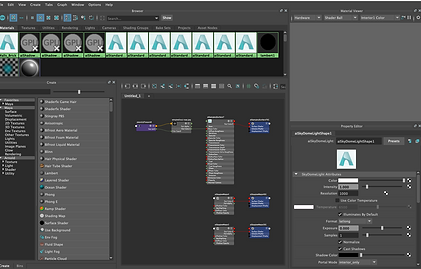
I decided to create only a wall with window, because of the texturing. I had problems with it, and I learned how to use Hypershad, because my textures were hidden two times and I needed them back, I just opened Hypershade and learned how to search them and to upload them again. About all my textures I used photoshop and UV mapping, because it is more understandable and It gives me the chance to create more believable buildings.


So, I created a PolyCube and then I shaped it as a flat wall, then I started with Multicut for more Edges and build a window with that. I used Face mode to select the windows and to delete them, after that I connected the edges between the window frames and bridged them, to look more like real window, not just a cube with textures. For the convex parts I used Extrude for the Faces and Edges where I wanted to extrude this model.
So when my shaped model was done, I started with the texturing.


With my UV map, I know it might look wrong to you, but because of the face mode and selection I can see which part where it belongs on my actual model, I decided my UV map to stay like this ( I used Automatic from UV ), Because I actually needed small part of this uv map, for the actual wall. And you can see how my window looks like, it is not bad, because in Arnold it looks pretty believable. I have never been so exited to create buildings in Maya, and I like the work, it is not har, because all you have to do after that is to adjust the shape of your building. ( Of course If we want it to be believable )


After all that, all I have to do is to duplicate another wall and to combine them both, I duplicated 2 times the actual fist model and created the first floor with the first side of this building, then I duplicated those 3 walls with windows and after their combination and rotated it, because of the shape, so you can see every side of every floor is with three windows. when I created this shape ( I_ ) I duplicated the whole floor 7 times and created a roof from two PolyCibes with textures - Standard Surface, combined it all and here it is the building:


Here it is, how it looks like in Arnold, I created three more small floors and duplicated the roof from the first one, then used multicast to create Edges that after I extruded, to look more real.
- Building 3 -
For my third building, I used a duplicated module of a wall with window from my second building, because I wanted to experiment with the shape and the textures, so I started with another UV Map for this one, and searched for Building in New York which are with this Surface.

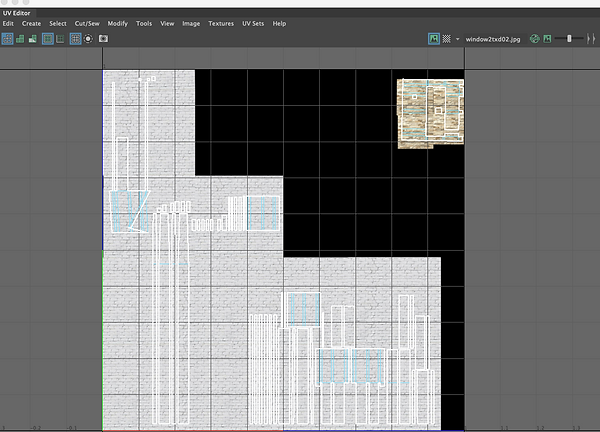
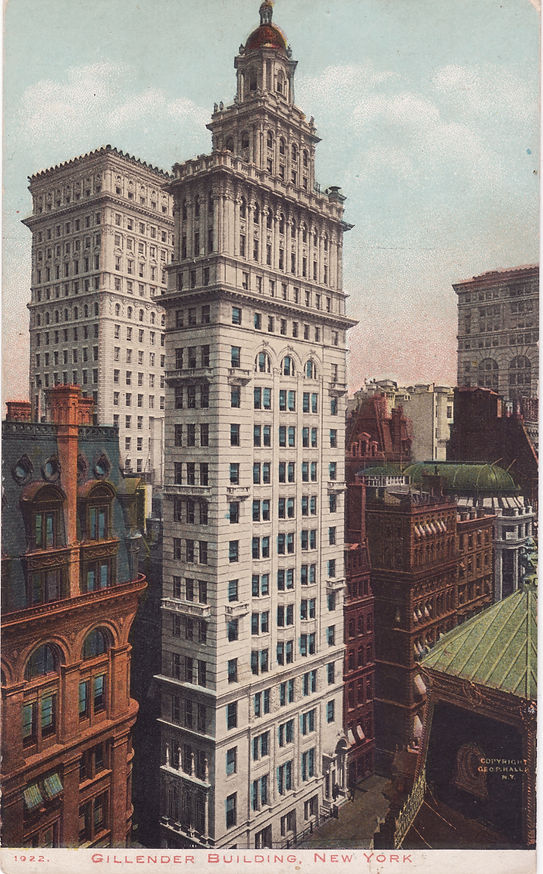
And I used Photoshop and textures taken from web pages for textures, and I just uploaded the JPEG file in Maya. Soon after I realised that it look good and I started with the shape. I` Rotated and Duplicated again, the duplicated and floors, it is a little bit hard to create one floor straights, that is why I used to see the fourth sides of my workspace in Maya.


And soon , my third building is done, she is higher than the others, bright and it looks good because of the contrast. The rooftops of it are done with PolyCubes again, all duplicated and then their size has been changed by me, their textures are - Standard Surface
- Building 4 and Building 5-
I created another PolyCube, after that I shaped it and used again multicit for creating another edges and faces that I want to extrude, I deleted the back side of this Wall with squarely shaped form of the window, as you can see. And Created another UV Map using Automatic, and created an UV Snapshot. Again, I used photoshop for this task and created different textures for both Buildings, because they are the same, but the first is very high, the second one is standard.


Used Textures:
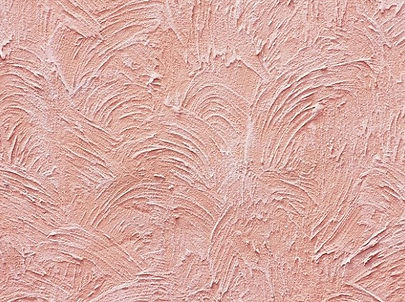

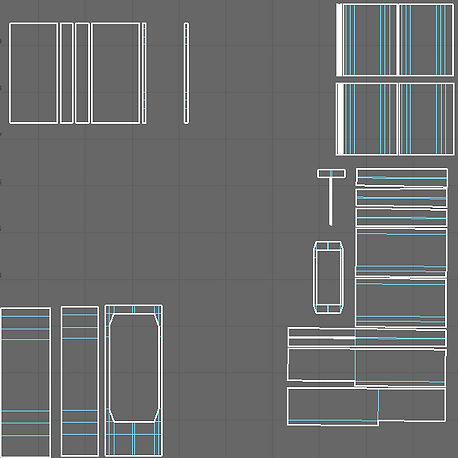
Soon after creating the building on the same principle as my other buildings, I created strange building with pinky look, so it is different as a modelling and as a texturing. The other building is the same, but it is not new to this one, it is only 4 floors high, so they are the same, but their roofs will be different.


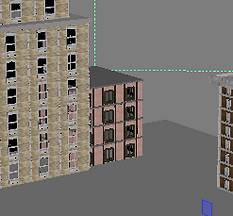
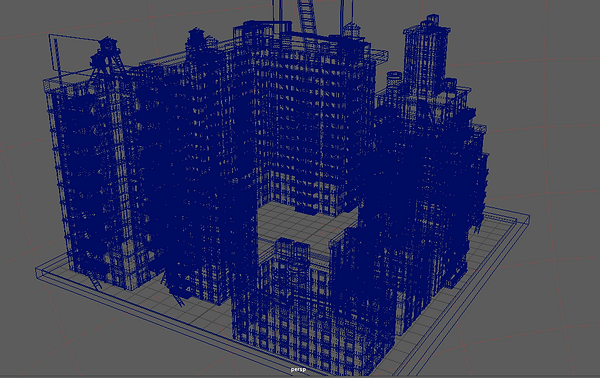
Now, you can see all my buildings for now, in Arnold, I created a 360 degrees sphere of light, for now, just to show you how they look like. They are believable, so I am feeling good of my work for now.


- Buildings 6 and 7 -
My Building 6 was created through PolyCube, I started with shaping the form of a wall with window, because my strategy is to create only one part of the building in this case a wall with window, and after that to create and add texturing to make it believable. So, I used multicut, extruding the face and shaped the form of an actual wall with window. after that I selected all the back wall through faces and deleted it, because of the UV Mapping.


You can see how it actually look like and the going through of deleting the back faces


I used these textures for this model, but for the UV map, I used different settings. First I selected the whole wall, because it has to be different. I have done the whole uv map as Normal- Based, and started selecting the whole wall and used Create UV Shell to cut it, because I want to move it and to add different texture. This way All the parts of the UV Mapping were cut. I used Photoshop to Create the textures and upload it through Standard Surface.


UV Snapshot in Maya and Photoshop


This is the end work fo the wall with the window, it has textures, I deleted the squares inside the window and bridged the edges between the frame of the window. And the funny part, I Duplicated it one by one and after that Combined the whole modelled Building.


You can see the building with the other buildings, also you can see it in Arnold, I am impressed how believable it looks with those textures.


For Building 7, this building is the same as Building 6, but the only changed thing is the shape of this building. It is smaller, than the others.

After creating the form of the roof I decided to sort all the Buildings and they look really good in Arnold. I wanted first to create the buildings one by one and after that to start with Water Towers, Air Conditioners etc.
Now I have all my buildings with textures and have to start with the actual things.

_pn.png)
- Fire Escapes ( EXIT ) -
Fire Exits are Pretty Simple, but at the same time not especialy for modelling , because you have to duplicate almost everything. It is mounted outside of the building, so after modelling the parts that I need, I have to duplicate everything. Usually people are putting them on buildings with flats under the windows. My modelings started with PolyCubes, a lot of them, for creating this little platform and the stairs, I created the platform first and after that created the stairs. I used key W, E, R. I used to work on it for hour and a half with duplicating and combining the stairs with different buildings. So now my buildings look more believable than before. You can look the going through:


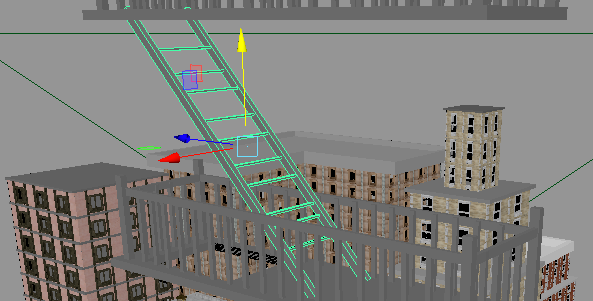
I duplicated the Escape Exist and added Standard Surfaces with different tone of the grey and they look okay Arnold.


-BillBoards -
Billboards are easy, My firs one is on Coca Cola, I created a PolyCube and after that scaled it and created Two other for props, putted simple textures and it is done.


Arnold:


Textures used:
![300367-1920x1080-[DesktopNexus.com].jpg](https://static.wixstatic.com/media/c837e2_dbe756e578284acda503038d7adc965a~mv2.jpg/v1/fill/w_523,h_295,al_c,q_80,usm_0.66_1.00_0.01,enc_avif,quality_auto/300367-1920x1080-%5BDesktopNexus_com%5D.jpg)

The Second Billboard is done by duplicating the first one, and only putted different texture on the front side , textures are done in Photoshop:


The third and the forth one are the same as the other two, so the different thing is the front texture. Here are the images:


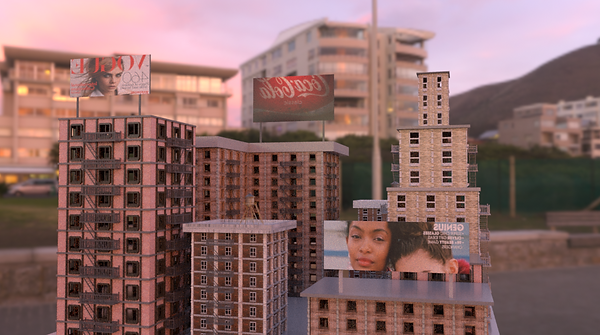
After 50% is done, I decided to add background downloaded from the HDRI link from week 3. You can see how believable they look in Arnold with background. Now I have to Build on the rooftops. I am feeling good with my work.


- Water Tower 2 -
I decided to model another Water Tower, but in different way, there is not only one reference about this model, because I researched about it and saw a lot of different images and then decided to create my unique one.
So, I started with the lower part that holds the whole pressure of the Water Tower. Everything is modeled by Poly Cubes, you can see every Cube is shaped in a different way and it is used rotation, scaling and etc. I wanted this to be from wood, so that is the reason there are planks here.


After that I started modelling the other parts of the Water Tower. The actual Water Tower , I used Vertex mode, multicut and after that extruded edges and etc. It is almost the same as my first Model of Water Tower.


Now, the model is done, It is on three parts , to be easy for me to create an UV Map and to texture it, and if I do not like something to delete it without a problem. So I started with the UV Map.


UV Map : Textures:


They are done and look very good in Arnold, you can see. So, now, my New York Buildings with their rooftops are almost done, I have to model Air Conditioners and Barrels, and Pipes.


- Air Conditioners -
From this reverent picture I decided to model two different air conditioners and after that to duplicate them on my roofs, so I started with Polycube, multicuted it and extruded different faces (parts) from it to shape the right form of the Model. The circles are done by cylinders and first I have done them not combined, just to be more easy for me to texture them. I tried to put more details from the textures ( for looking more believable in Arnold) rather than putting so much details and after that the textures to put them back from persons eyes.


These are my textures for the Air Conditioners, I have cut peaces from these pictures with the help of Photoshop I have done my textures and uploaded them in Maya.


Here are the UV Snapshots about my components and the actual textures putted on them, after that everything is adjusted in UV Map, I have created UV shels about different components of the models, Switched modes ( Normal- based, Automatic etc. ) from UV Mapping. And at the end everything fitted perfect.


Air Conditioner 1


Air Conditioner 2


And in the end, I duplicated both of them several times and adjust them on every rooftop, but in different position, there are some why are smaller than other, other rotated. That was the hardest part, but I am feeling good with them, because they look good in Arnold.

- Barrels, Pipes and floor -
1. Barrels
They were really simple, I created Poly Cylinder and from it I shaped the form, first I switched to smooth mode and used multicut to create subdivitions which I can extrude or their faces between the edges. So, I modeled the Barrel and created a standard (basic) UV Map for it and thee different textures. Now I have three different barrels which I duplicated several times and putted on the rooftops next to the other stuff.


These are the textures of the Barrels done on Photoshop:

2. Pipes
They are so simple, but to adjust them is the hardest thing to do. It took me a lot of time to adjust them. I created Polygon Cylinder and changed the level of subdivision to and height. The top and bottom faces are deleted, the top and bottom edges are extruded several times, after that extruded one more time to create an actual pipe. For a pipe which is 45 degrees I have done it with the help of bend section. It is done 45 degrees and after that I deleted the history because inside the pipe there is a dark blue curved section which have to be deleted with it's history and after that switched on smooth mode and my pipes are done. with a lot of duplication and rotation I adjusted them on my rooftops.


3. Floor of the Buildings
To be more comfortable while looking at this model I wanted to do a floor using a cube and the standard UV Map with this texture:

- Final Renders -



- Time leap -
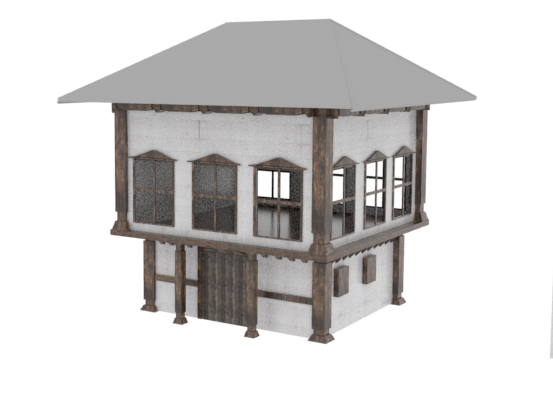
For the second part of my assessment I chose to show you the look of an old Bulgarian house, that is the reason why I modelled one.
Typically, these houses are built of wooden beams, concrete walls or stone walls and lime mask above the concrete walls or the stone walls. It is usual for them to be in this style that I am going to show you, with big wards and wooden side stairs with terrace that is called "Chardak" in old Bulgarian which means - High terrace with roof. It is easy to be modelled because of the texturing, I have been using for the whole house ( without the yard ) the same textures, just played a lot with the UV Mapping. It took me 3 days to model the whole object and to took the final renders, because I formed almost everything from one beam and 3 walls.
Here are references for my House:


First, I started with the first window, after that and all of my inspiration do the progress. I created a wall first with two windows, but then I decided to delete it, because I had problems with the texturing. So I modelled a wall with window from a PolyCube, as usual, and shaped it through MultiCut, Extruding faces etc. After that I used Photoshop for the texturing. The UV Map was easy, I understood that I can change the modes ( Automatic, Camera-based etc. ) only for faces that were chosen by me, so I have been playing around with the construction of the UV Map.
You can see the progress:


These textures are the main that I used for the whole house
Textures :


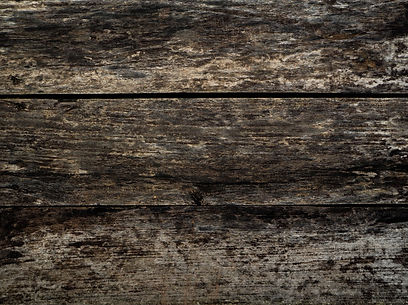
I created the second wall with the main door of the house. Usually doors are built from wood, so in Arnold it looks very good. It is shaped with Multicut, Extruding, deleting faces and edges and adding textures ( they are the same as the first one ), again I have been playing with the UV Map as you can see. Textures are done with Photoshop.


This is a beam, I modelled it and it was very easy. I used PolyCube, extruded it and after that played with vertexes for this form. Texture is the same wooden texture from the first textures, so you can see that everything is straight forward, shapes are very easy, but at the same time you can create something very complexed.
The UV Map is the standard one for a Cube, it was not necessary to be changed.

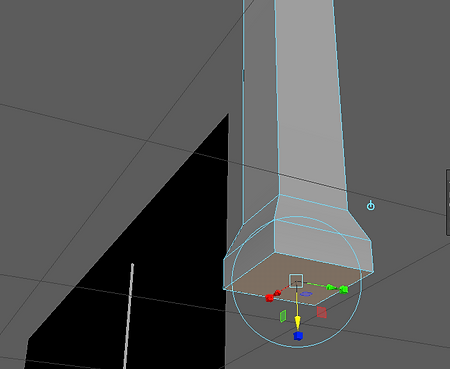

Soon after, I started with the building of the whole house, you can see another walls, which I modelled very easy with Multicut and Extruding, using the Standard texturing from my materials ( Standard Surface 01, 02, 03 etc. ). You can se that curved part of the wall on the second floor, I modelled it through vertexes.
You can see where and how my beams were Scaled and Rotated.


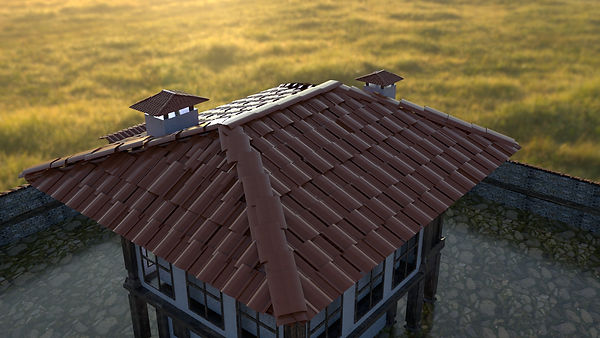
I decided to model floors for my house and to do a rooftop and above it to model and duplicate tiles, because it is usual for the Bulgarian old traditional houses. I also putted a cube with texture same as the walls of the house, inside the second floor, because of the windows and supportive beams to be more believable. On the construction that I have done for a rooftop I will model and duplicate tiles.

- Tile for a roof -
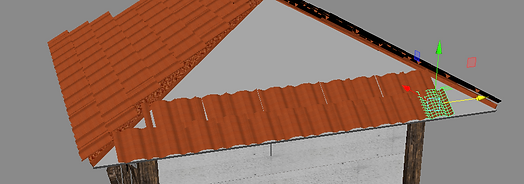
It is very easy to model a tile, I used the 6th figure from the Poly Modelling, that is a flat network from squares. Through Vertex mode, you can choose which vertexes to move up or down. After the shaping, I created an UV Map, it is the same as the figure, but both of the sides are one on another, but I want both of the sides to be the same, so my UV Map stayed the same. I have putted a texture from a wall, but it is the same effect, I created the texture in Photoshop, I cropped the image and pasted it several times, and you can see the final result.


I started duplicating the tiles and I have been putting them one by one, because of the shape of the roof. The roof has the same texture as the tiles, it is just a shaped cube and I putted Standard Surface 06 of each of the fourth parts of the roof.In general, I formed the two different sides of the roof and after that I combined them separated and duplicated them and rotated them to fit on the roof.



-The terrace with stairs -
It took me a half an hour to model the terrace with the stairs and to put supportive beams, only modelled with the actual BEAMS. It was a successful experiment and I like it very much. Is all done from one beam with textures, rotation and scaling, changing the form. Let's go through the process:


I modelled and a chimney for my house from supportive materials, I used one of the walls of my house's structure, the whole roof duplicated and four beams.


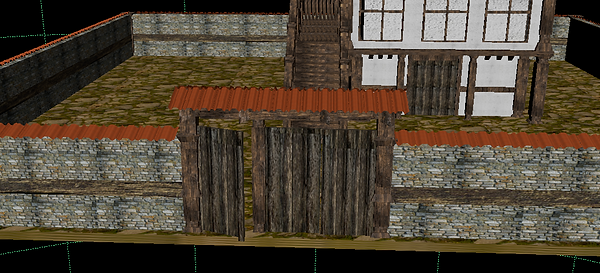
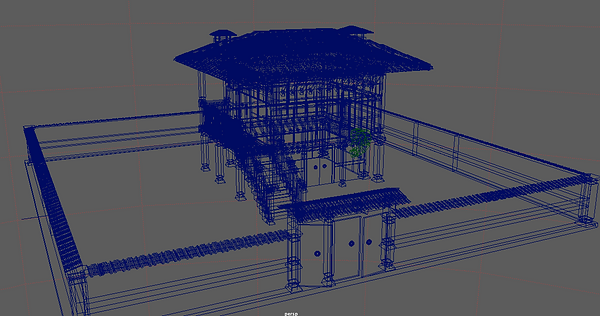
My house is done, so now, it needs ward with gate and fence from rocks. I created two PolyCubes and shaped them in the form of a ground and a wall. For the ground I searched for a texture a long time, so I erased part of a real picture and copy- pasted it in Photoshop on the UV Map. With supportive materials as beams and tiles I created the gate and the last elements of the ward.

FINAL:



-Textures and UV Maps -

Here are all the UV Maps and Textures Used for the model of the Old Bulgarian House.
- FINAL RENDERS -


